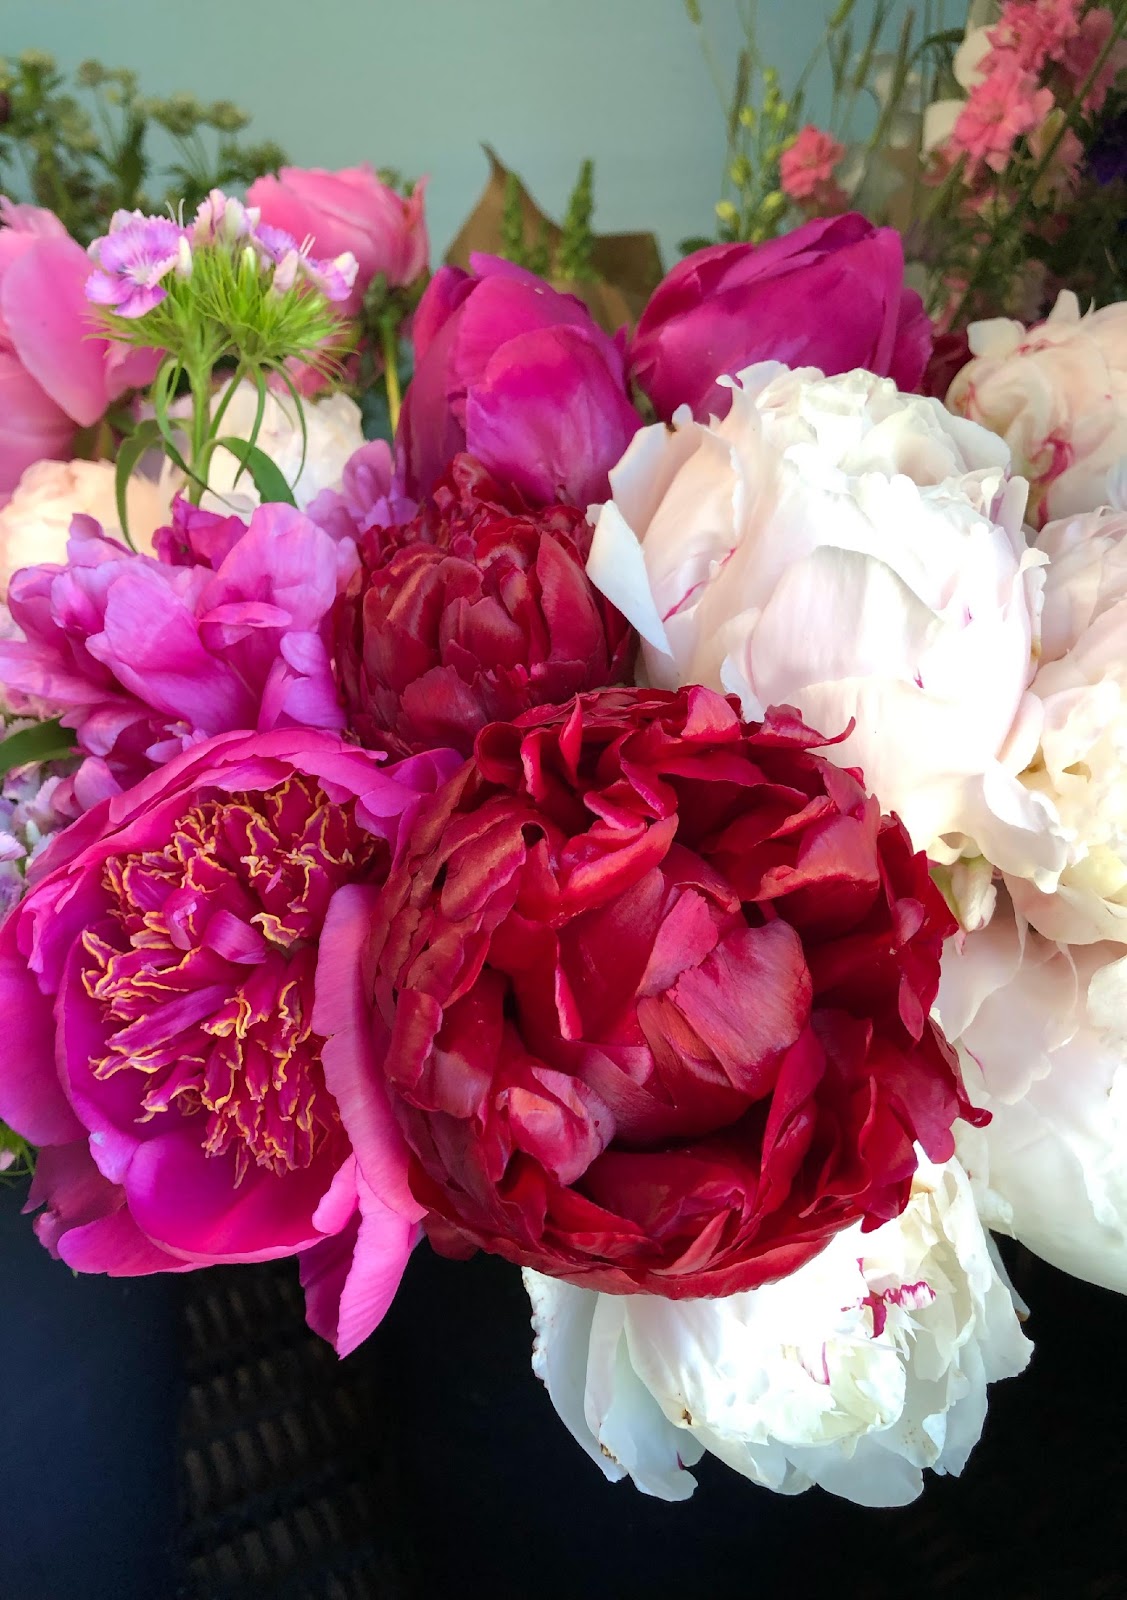
Peonies, Glorious Peonies!
There is no flower that has the sumptious and bodacious beauty of a peony. Throughout the growing season I am often stopped in my tracks by a particular flower… the perfect colors, arrangement of petals, the light that hits a flower in just the right way and makes your heart sing. But peonies have it all. No self respecting garden should be without some, no vase that graces your home should be empty of them when in season.
Seasonality is a theme I return to frquently, and with just cause. Nature has figured out when to produce these beautiful blooms, and thinking that we’ll outsmart Nature just won’t work! With that in mind there are a few tricks I will share about extending the time you can enjoy them.
There are numerous colors of peonies, whites, salmon, pink, red, maroon, and everything in between. There are the typical bush peonies that we are familiar with, the crossed peonies or ITOH peony, and tree peonies. Some peonies are of a single variety with an open face, others a fully double with multiple petals that are frilled and full. It is the shrub peony that I will discuss today, with it’s very early, early, midseason, late, and very late varieties that will extend their growing season from early spring to almost summer.
When to plant? Definitely try to avoid the temptation, plant catalogues, and nurseries that offer peonies to plant in spring. The best time to plant peonies is actually in the fall, when they don’t have to compete with weeds and high temperatures for water. By planting in the fall, you don’t have to try to keep them watered, but let nature do the work for you. The cooler temps will keep the soil moist, while the peony roots establish themselves.
How to plant? Definitely, plant the peony eye (the pink growing points) no deeper than two inches below the soil. Be careful not to break off the eyes. Dig a hole large enough to accomodate the large tuberous structures that are the storage units of the peony. Think carefully about where you will place the peony, not only from an aesthetic point, as a peony can last greater than 20 years undivided. You can mulch the area around peonies, but try to avoid putting a lot of mulch directly over the roots.. If concern for winter heaving is a worry (and in WNY, it is a concern with our freeze-thaw cycles, and intermittently reliable insulating snow cover), mulch over the peonies, but pull the mulch away from the peonies in early spring when growth is apparent. If you do, after a time, feel the need to dig and move a peony, if well established and with multiple eyes visible, you can divide and replant your root stock, planting 3-5 eye portions for the best growth.
When to pick peony stems for cut flowers? With an newly established planting, it is best to pick sparingly from the plant for the first and second years, and then abundantly beginning the third year. Doing this allows the plant to put its energy into its growth and survival. So avoid any cutting of long stems initially, but instead cutting short stems just above a leaf node is best.
Peonies stems for cut flowers can be cut at any stage from soft marshmallow (more about that in a moment) to fully open. When cutting a peony stem at a more immature stage, it will open fully over a day or two, allowing you to enjoy it longer. If cut when it it is fully open, and mature, it will naturally last less time (generally 5-7 days). A lovely lasting arrangement of peonies is one that mimics nature, where some flowers are in more of a bud stage, and some more open.
What is marshmallow stage, and how can I enjoy my peonies longer? See the photo below of Peony Coral Charm, cut in the marshmallow or soft bud stage. If the bud feels softly squishy, just like a marshmallow, cut. If it is firm and hard, it is unlikely to open, and is immature. The Coral Charm peony is a lovely single variety, that blows open quickly, so it is important to cut it at the marshmallow stage.
Prolonging your harvest of peony stems is possible with a few caveats.
If you have a refrigerator, or cooler that can maintain a temperature of 34 degrees, you can hold peony stems for about a month. If using a refrigerator be sure to avoid placing the stems in any very cold spots (all refrigerators have them) where they are likely to freeze. The method is to cut the stems in the marshmallow stage, then wrap in newspaper bundles of about 10 stems, covering the top and bottom, and taping your bundle.

They can be stored horizontally without water for about a month. When you are ready to use your peony stems, simply unwrap them, give the bottoms a sharp angled cut, place them in warm water with flower food, in a warm room, and they will open.
A word about ants on your peonies. Peonies do not produce ants, and ants do not harm peonies. In spring, when peonies are producing their buds, the buds are covered with a sticky substance which ants actually “mine”. Industrious little creature that they are. The removal of the sap likely helps the peony blossom to open. Don’t be aftaid of the ants (although, in honesty I have beeen bitten by ants), and simply brush them off.
Enjoy growing and cutting peonies for your home.
Carrie Kling, Master Gardener
Windy Acres Horticulture, a flower farm growing Specialty Cut Flowers serving florists, events, and community CSA’s.
716-628-6007.
peasSweet Peas!
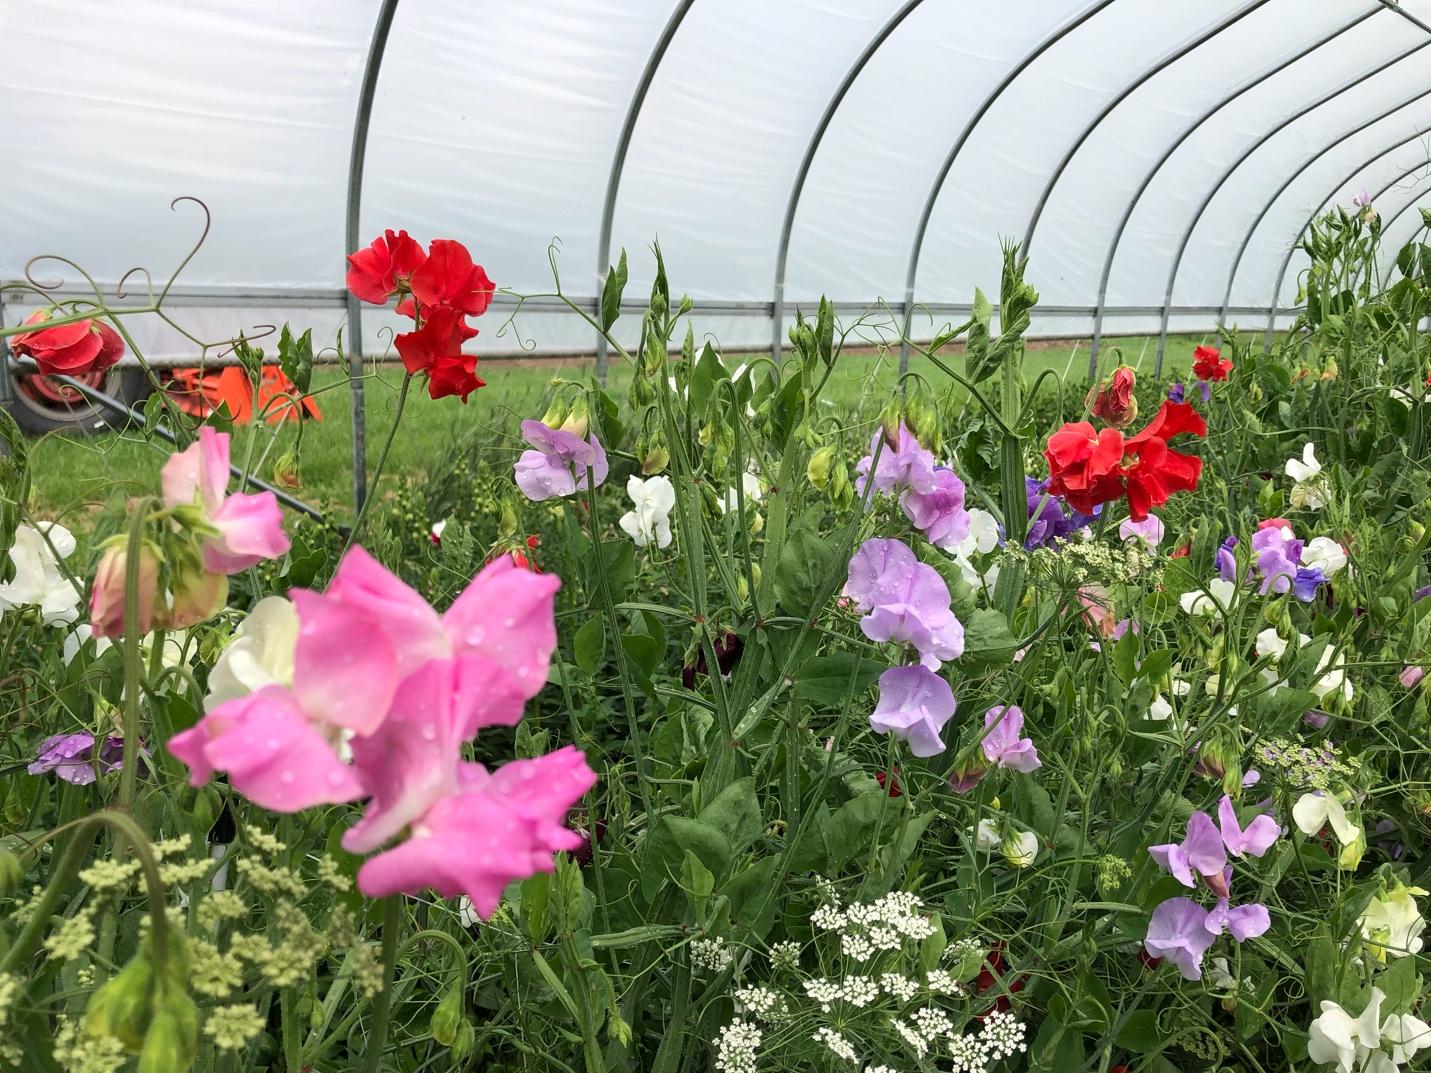
Sweet peas are reminiscent of everything old fashioned. Perhaps your grandmother grew them, or perhaps you remember their intoxicating smell as a child. There are few flowers that are quite so beautiful. There are few flowers with such a lovely scent. They come in a myriad of colors and hues, and are perfect in a cutting garden.
Although their origin can be found within Sicily’s Mediterranean climate, they were transported to England, where most of the propagation and genetic breeding occurred. They are remarkably easy to grow. Sicily’s winters are in the range of 30 degrees Fahrenheit with warmer daytime temperatures….temperatures that we can easily achieve in WNY. Surprisingly, once germinated and growing they can take temperatures as low as 20 degrees Fahrenheit. An interesting fact is that Sweet peas are remarkably hardy. Sweet peas as old as 30 years that have been kept frozen, have been found to germinate!
I would consider them a “cool” flower in the sense that beginning to grow them now, and planting them out as soon as the soil can be worked will give you a head start on the warm temperatures which will signal their shutting down. Because of their large size, I would consider them a great project for parents to share with their school aged children.

It is not necessary to presprout them in water, as had previously been recommended. Plant them in a general potting mix in six pacts or even better, tall containers that mimic “root trainers” that give the plants room to grow a stout plant with long and robust roots. Any tall, narrow container can become a “root trainer”. An environmentally sound method would be to save toilet paper cardboard roll inserts and use those, but actually any container will do. Taller is better. Germinate seeds in a cool envirnment at about 50-55 degrees. Once germinated, grow them on at the cooler temperature of 40-45 degrees in a sunny area. Try not to let them get tall, thin and leggy; if so, pinch off some of the top growth above a leaf set to redirect the plants energy into growing a branched shorter plant at this initial stage. (If you love the challenge of starting new plants, you can dip that pinched growth in plant hormone, pot them up, cover them with plastic or a humidity dome, and they will root!) Plant out a 3-4 inch tall plant once your soil is workable, 4-6 inches apart. If heavy sustained freezes are forecast, go ahead and cover them with a frost cloth held above the growing plants. I will plant in two parallel rows and erect a plastic netting between the two rows so that the growing tendrils have a place to attach as they climb. Some varieties may reach 5-6 feet! If planting only a few plants consider bamboo poles or similar support. They are generally not browsed by deer, but hungry deer are known to ignore such statements. To keep your sweet peas producing keep them well watered, fertilized, and cut.
Be prepared to cut an abundance of sweet peas to give as gifts and to grace your table. Cut them when at least two of the flowers are open, and place them in water with flower food. Vase life is usually 5-7 days if you change the water every other day, provide a carbohydrate source as flower food, keep them out of direct sunlight, and away from ripening vegetables. The more you cut sweet peas the more they will produce. Their straight stems will be the longest initially, but will shorten as the season continues. To overcome this use small vases, or cut some of the vine along with the stem. The curling, twining vine have such a lovely romantic look.
All good things must come to an end, so expect the sweet peas to slow down and begin to set seed as the heat of summer begins. At that time you can collect your own seed before pulling the vines, and replacing them with another cutting garden flower.
Happy Gardening! Carrie Kling, Windy Acres/Horticulture, A flower farm and grower of specialty cut flowers. www.windyacreshorticulture, 716-628-6007
Seed Starting, Soil Blocking, and Looking Forward to a Cutting Garden
There is something particularly satisfying about starting seeds while the snow flies and the wind blows. Blessed with weather from both Lake Erie and Lake Ontario, the lake effect is particularly harsh today. So snuggled down in the basement, I’m thinking of the future, of spring, of the potential in the seeds I sow. Until the weather turns the corner, there is no point in working outside in one of our unheated greenhouses. So until then, I work on starting “cool” flowers. These are flowers that can go in the ground early, can take cool temperatures, and even some light freezes. The plan is to eventually plant most in an unheated high tunnel, and some outside under the protection of frost cloth. What flowers seeds can be planted now you ask? Flowers that like cool conditions! People in Zones warmer than our 6B have the luxury of starting these flowers in the fall. These plants take off like gangbusters when the soil warms. In our climate we can start these early, cool loving flowers, earlier than the typical “6 weeks before the last frost” recommendation, and enjoy blooms in the spring. Examples of flowers that enjoy cool growing conditions and are perfect for a spring bouquet are burplerum,
Ammi, Daucus Carota, campanula, snapdragons, poppy, bachelor buttons, godetia, fever few, sweet william, foxglove, and sweet peas.
Soil blocking is based on a principal of root pruning. When air touches the tiny roots on the bottom of the block, it is naturally pruned, making for a heftier and stronger root ball. Coupled with some shelves, and shop lights, you can start a lot of seeds and soil blocks in a small space. Using heat pads for bottom heat, and humidity domes are not absolutely necessary, but are definitely helpful as soil temperature is actually cooler than the air temperature in a house. A good source to read about “cool flowers” and soil blocking is in Lisa Mason Ziegler’s book, Cool Flowers: How to Grow and Enjoy Long-Blooming Hardy Annual Flowers Using Cool Weather Techniques. Lisa is a fellow flower farmer, and has perfected flower farming in her urban farm in Newport News, Virginia.
When using a soil blocker, the soil mix used is the opposite of the light airy mix you would normally use to germinate seeds. Instead, like making mud pies, the soil must be wet and dense. Here is Lisa’s recipe for a soil blocking mix. Other formulas can be found on line. Espoma makes a form of green sand and rock phosphate powder. They can also be found insmall quantity containers as a mix at Lisa’s on line store, www.thegardenersworkshop.com.
Mix together:
16 cups of sifted peat moss
4 cups of sifted compost
¼ cup greensand
¼ cup rock phosphate powder
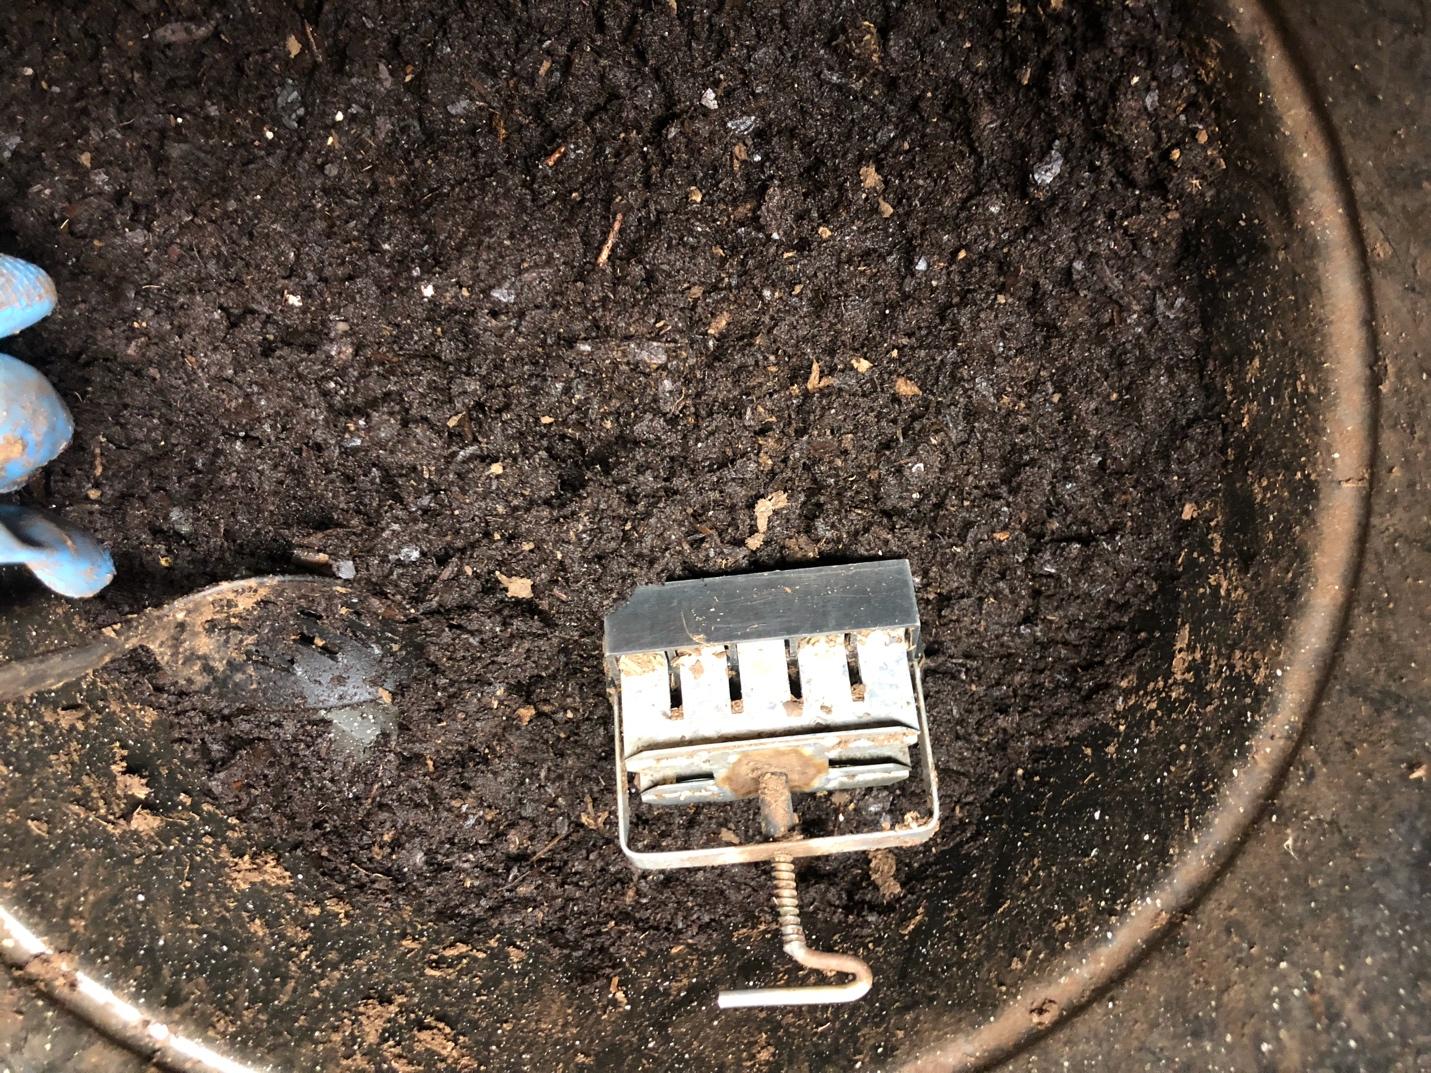
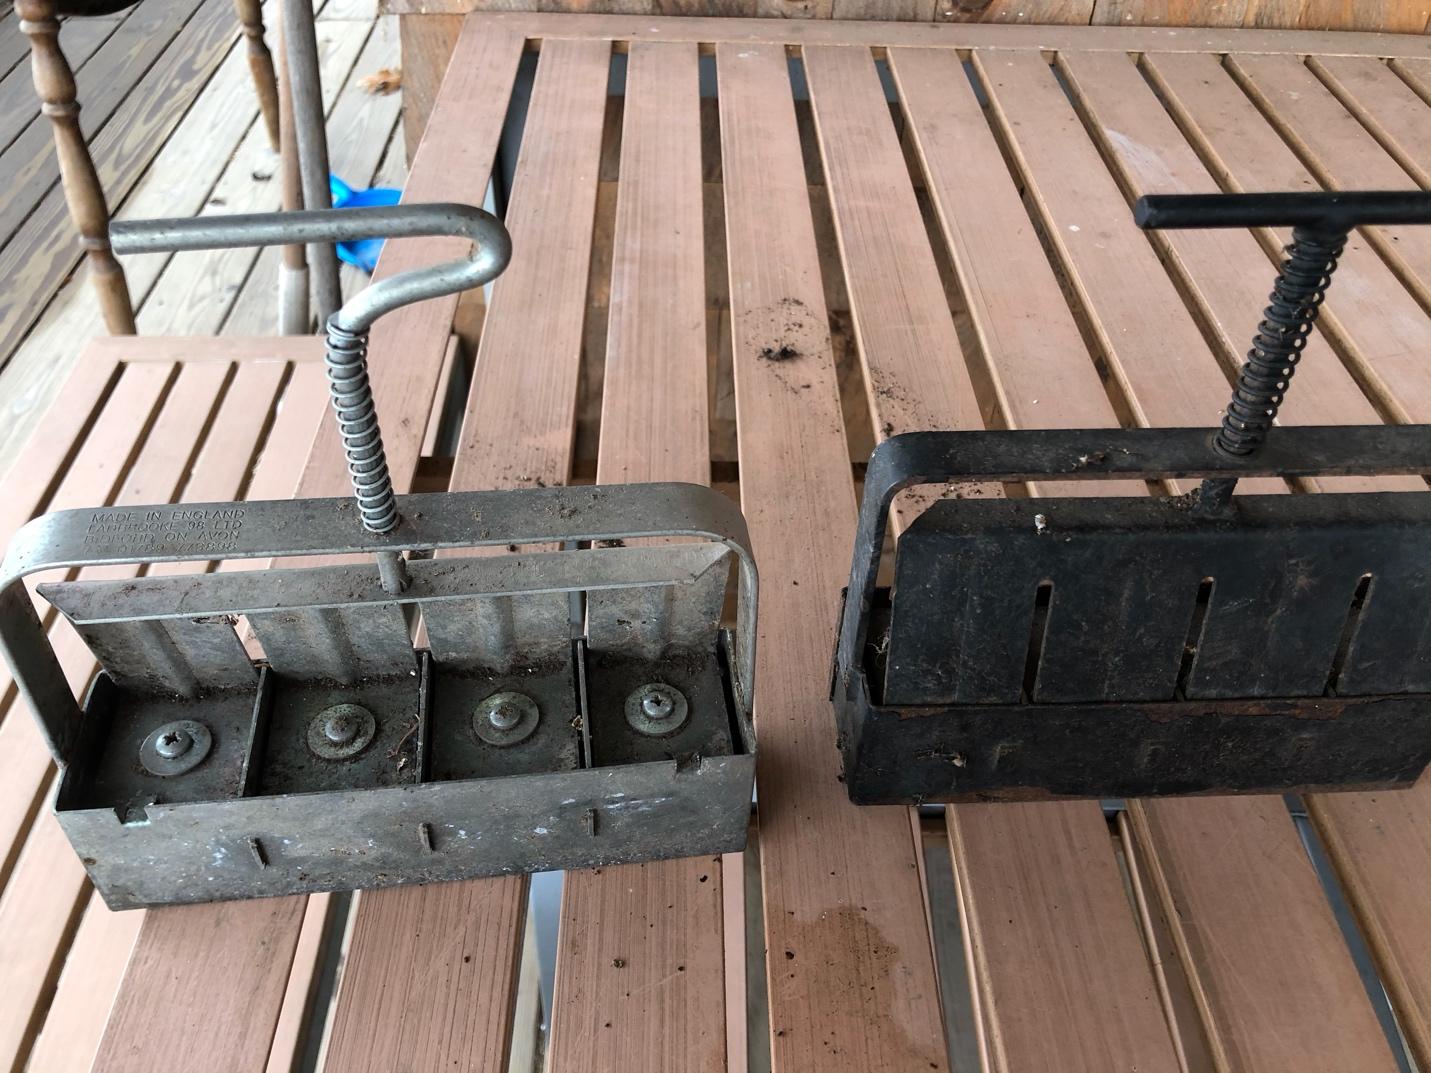
Add 6-8 cups of water to make a wet soil that will easily be released from the blocker. Getting the consistency right takes a little practice at first. If the blocks fall apart, the soil is too dry, if they fail to release, they are too wet. I find mixing the ingredients well and adding water, and then letting it sit over night often makes the best blocks. Here are some photos of a small ¾ inch blocker, and a larger 2 inch blocker. They are available on line at Johnny’s Seeds or Amazon. Also below is a photo of my shelf and light set up. Standard shop lights available from Home Depot or Walmart work. Once the plants germinate, you’ll want to adjust the lights so they are about 6 inches above the tray of plants. You do not want the plants to stretch and reach toward the light as they will become thin, leggy, and weak. Instead, using the chains that come with the shop lights, adjust the lights so they sit above the plants by about 6 inches or so. Not too close that they burn your tender young plants, nor too far that they stretch (think Goldilocks).
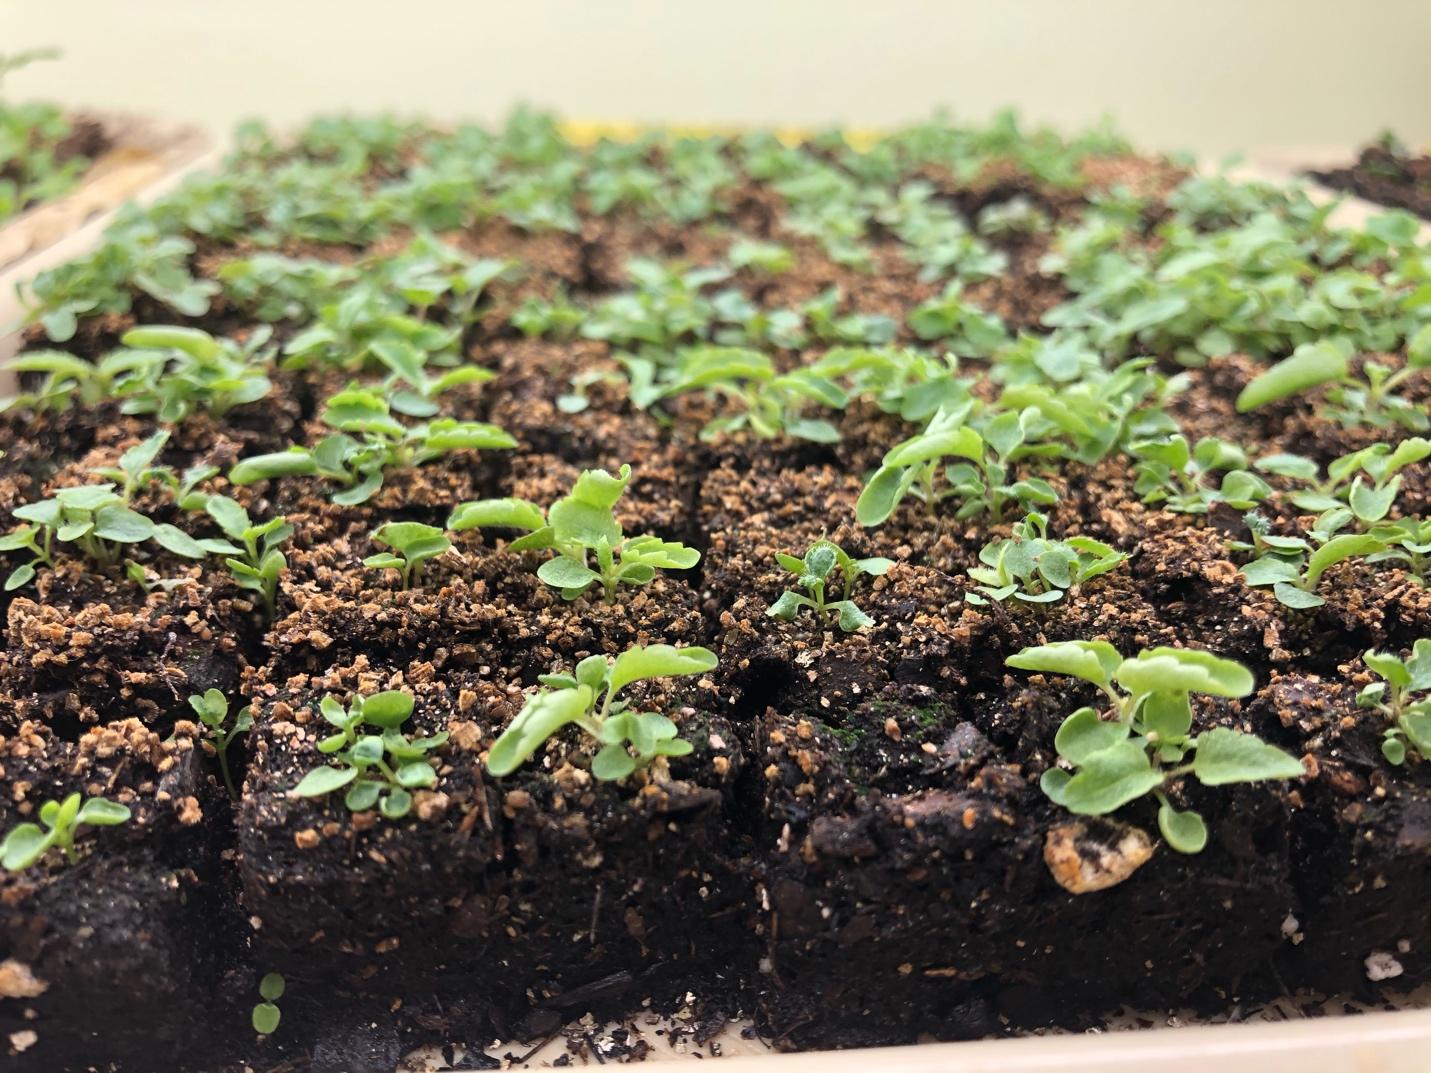
Below is the large soil blocker, a photo of ¾ inch soil blocks that are growing and my tray and light shelves.
Trays can be purchased on line at Amazon, or ask your butcher if you can purchase some styrofoam meat trays for a few cents each. You can also save your own meat trays. Be sure to wash them well with soapy water.
Soil blocks need to be watered every day, without leaving standing water in the trays. Using a narrow nozzled watering can, I pour water along the edges of the trays and around the openings left on the trays. It soon becomes apparent when the blocks have absorbed sufficient water.
The goal of soil blocking is to start a variety of seeds early, in a small space, and get them outside, hardened off, and planted as spring is beginning. The aim is for a 3-4 inch plant to go outside. If you find that your plants are out growing their small ¾ inch block, you can easily “bump them up” to the larger 2 inch block (the ¾ inch block fits directly in an indentation in the 2 inch block), or pot them into 6 packs. Bumping them up works as well, but takes more room, as does use of the larger blocks or 6 packs. If you have a heated space where you can set up your shelving unit and lights, that is ideal. A heated basement or an unused bedroom works as well.
Hardening plants means aclimating your young plants to cooler outside temperatures prior to planting outside. A covered porch or carport is ideal for this. Ideally, a hardened plant can go directly into the ground once the ground is warm enough to plant. The plants listed above can take cool temperatures, but be prepared with frost cloth ready to cover them if freezes or prolonged cold temperatures are predicted.
Some hacks for starting seeds is to place the seeds in a small jar lid, plastic or aluminum works well. Many seeds, like snaps are realllllly tiny. Use a moistened toothpick to grab a seed and place it in the soil block’s indentation. Be sure to follow packet directions about the need to cover the seed or expose it to light. If they need light I will use a fine sprinkling of vermiculite to barely cover the seeds, but keep the seeds from being washed or blown away inadvertantly. If the seeds you start in soil blocks are long and linear, and don’t sit nicely on top of a soil block, push at least half of the seed vertically into the soil block so they get good soil contact.
I hope I have given you some food for thought, and that you will consider starting some early season flowers. As the snow flies, it is nice to see something growing. This makes the anticipation of spring all the better. Sitting down with a seed catalogue and a cup of coffee (or wine) is a perfect way to start the process. Plan a cutting garden with easy to grow “cool flowers”, and with a few tools, and time, you will be rewarded with Mother Nature’s gift of color, scent, and beauty. Share this time with your children and you have started a life long journey and love of gardening.